This tutorial demonstrates the use of Microsoft SQL Server Management Objects with a custom action in Visual Studio Setup project to deploy a database for your application. It is based on my development of Good Steward Express Edition application which can be downloaded at http://www.sardonyxtech.com/products.aspx
References:
- MSDN article: Walkthrough: Using a Custom Action to Create a Database at Installation
- Handling “GO” Separators in SQL Scripts – the easy way
Step 1. Create an installer class
To create an installer class, we first need to add a Class Library project in the solution. It is fairly easy to add this project and I will skip it. I named the Class Library “InstallDB”, then I added an Installer Class in the project:
- Right-click “InstallDB” project and click Add =>New Item…
- In the Add New Item dialog box, select Installer Class. In the Name box, type DBInstaller.cs.
The Solution Explorer should be something like this:

Step 2. Add code to the installer class to deploy database
The method demonstrated in the above MSND article works well for creating simple and small databases, in reality, most developers will not create complicated database by manually writing SQL scripts; instead, they will use some database management tool to build the database, then use the tool to generate the SQL scripts for creating the database and its objects (tables, views, and stored procedures, etc.). If you use MS SQL Server Management Studio like me, you will find that the generated script by the tool contains “GO” after each SQL command. It is not a valid keyword in T-SQL, but a special command recognized only by some database management tools. Therefore, if you use the method in the above MSDN article to execute the generated SQL query, you will definitely get errors, because ADO.NET does not recognize “GO”. In this case, you will have to use SMO to execute the generated SQL scripts as the second reference above.
However, what I will demonstrate here is how to override the installer class’s Install method to attach an existing Microsoft SQL Server Express database by using the .mdf file and Microsoft SQL Server Management Objects (SMO). You may ask how can you include the .mdf file in your application? It is simple once you have a Setup project added in your solution. Here is how:
- Select your setup project in the Solution Explorer
- Click File System Editor icon at the top of the Solution Explorer
- Under File System on Target Machine, right-click the empty area and choose Add Special Folder –>User’s Application Data Folder
- Select User’s Application Data Folder in the left panel, and right-click your mouse in the right panel and choose Add –>File…
- Browse your computer to find the database file .mdf file and click OK to add the file. The file will be packaged in the final MSI file.
Now, when the setup process will automatically copy the .mdf file to the user’s Application Data folder before the installer class is called. Below is the source code of overriding the Install method in the installer class to attach the database by using SMO (you will need to add Microsoft.SqlServer.ConnectionInfo.dll, Microsoft.SqlServer.Smo.dll, and Microsoft.SqlServer.Management.Sdk.Sfc.dll into the References, they are located at C:\Program Files (x86)\Microsoft SQL Server\100\SDK\Assemblies\):
public override void Install(IDictionary stateSaver) { base.Install(stateSaver); try { SetupDB(); } catch (Exception ex) { throw ex; } }private void SetupDB() { //Find the mdf file that has been copied to user's AppData folder //Then move it to MS SQL Server Express's data folder //Then attach the database by using SMO class string dataFileName = ""; string databaseName = "GOODSTEWARD"; string logFileName = ""; StringBuilder sb = new StringBuilder(); sb.Append(Environment.GetFolderPath(Environment.SpecialFolder.ApplicationData)); DirectoryInfo diSource = new DirectoryInfo(sb.ToString()); if (diSource.GetFiles("*.mdf").Length == 1) { FileInfo fiDataFile = diSource.GetFiles("*.mdf")[0]; dataFileName = fiDataFile.Name; FileInfo fiLogFile = diSource.GetFiles("*.ldf")[0]; logFileName = fiLogFile.Name; // using SMO to check if the database already attached try { SqlConnection connection = new SqlConnection(@"Data Source=(local)\SQLExpress;Initial Catalog=master;Integrated Security=True"); Server svr = new Server(new ServerConnection(connection)); //1. find the folder where master database's mdf file is stored // then copy GoodSteward.mdf file to the same folder string dataFilePath = svr.MasterDBPath; sb = new StringBuilder(); sb.Append(dataFilePath); sb.Append(@"\"); sb.Append(dataFileName); string destDataFile = sb.ToString(); sb = new StringBuilder(); sb.Append(dataFilePath); sb.Append(@"\"); sb.Append(logFileName); string destLogFile = sb.ToString(); FileInfo fiDestDataFile = new FileInfo(destDataFile); FileInfo fiDestLogFile = new FileInfo(destLogFile); if (!svr.Databases.Contains(databaseName)) { // if GOODSTEWARD database is not available, // then create it by attaching the GoodSteward.mdf file if (!fiDestDataFile.Exists) { fiDataFile.MoveTo(destDataFile); } if (!fiDestLogFile.Exists) { fiLogFile.MoveTo(destLogFile); } //2. Let's attach the mdf file. //Note, we don't have ldf file, because server will create it automatically StringCollection sc = new StringCollection(); sc.Add(destDataFile); sc.Add(destLogFile); svr.AttachDatabase(databaseName, sc); } else { // if somehow the mdf file is missing, then // copy the mdf and ldf files to the DATA folder if (!fiDestDataFile.Exists) { fiDataFile.MoveTo(destDataFile); } if (!fiDestLogFile.Exists) { fiLogFile.MoveTo(destLogFile); } //Then throw exception throw new FileNotFoundException("Database file(s) missing while database is still attached."); } } catch (ConfigurationErrorsException ex) { throw ex; } catch (Exception e) { throw e; } } else { throw new FileNotFoundException("Database file not found."); } }The basic idea of the above code is very straight-forward: copy the GoodSteward.mdf file in user’s AppData folder to SQL Server Express’ data file folder, then use SMO’s Server class to attach the database with the .mdf file (and .ldf file, if available).
Step 3. Create a Setup and Deployment project
It is easy to create a Setup and Deployment project in the solution and will be skipped in this tutorial. After the setup project is added, right-click it and choose Add –> Project Output, then in the Add Project Output Group dialog box, select Primary Output for the InstallDB project:
Step 4. Create a custom action
Select the setup project and click the Custom Action Editor icon at the top of the Solution Explorer. Then right-click the Install node and select Add Custom Action; in the Select item in project dialog box, double-click the Application Folder and select Primary output from InstallDB(Active), then click OK to close the dialog box. Now you should see a scree like this:
Step 5. Build the setup project and install the application
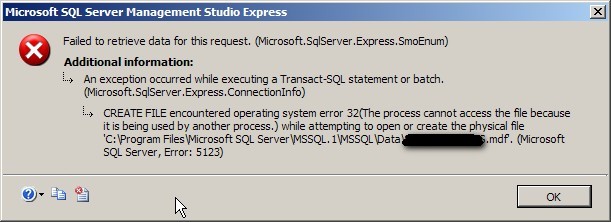
Once the setup project is successfully built, we can double-click the generated setup.exe file to start the installation process. If everything goes well, you should see a database created in SQL Server Management Studio Express. If anything goes wrong during the database setup, the whole installation will roll back.
Let me know if you find this post helpful or you have questions.