
In this post, I will show you how to create a bootable Kali Linux Live USB in Ubuntu 20.04 LTS and then configure a persistent partition so files and settings can be retained between reboots.
Preparation
Before we start, make sure you have the following items ready:
- A blank USB 2.0 or above drive, at least 8 GB
- GParted
- Kali Linux Live ISO image file
- UNetbootin
Now, let’s get started.
1. Prepare the USB drive
Before we can install Kali Linux on the USB drive, we first need to prepare it in a particular way. We need to create two partitions in the USB drive: one for the installation of Kali Linux and the other for storing persistent data. The tool we are going to use to create partitions in Ubuntu is called GParted, which is free and available to almost all major Linux distributions. If for some reason the tool is not in your distribution, you can easily install it. In Ubuntu, you can run the following commands in your terminal window to install GParted:
sudo apt update
sudo apt install GParted
a. Create New Partition for Kali Linux Live
Make sure the USB drive is inserted into your computer and then run GParted in Ubuntu. Choose your USB drive from the drop-down list in GParted. It usually is labeled as dev/sdb or dev/sdc. In Ubuntu, your hard drives and USB drives will be labeled as “dev/hdx”, where “x” can be “a”, “b”, “c”, and so on, with hard drives being listed first, followed by your USB drives. My computer has two hard drives (dev/hda and dev/hdb), therefore, my USB drive is labeled as “dev/hdc”.
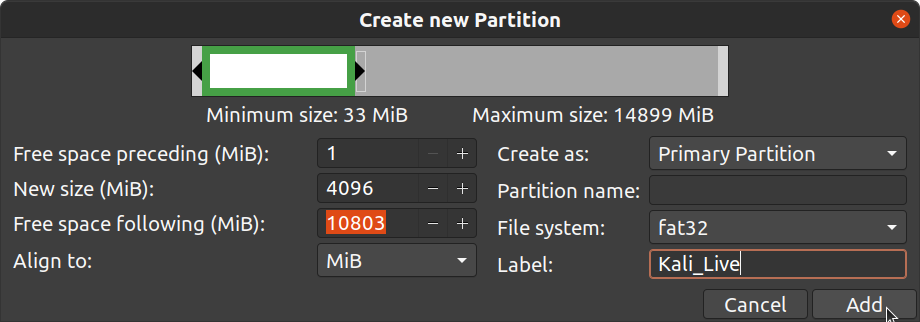
We will first create a primary partition and install Kali Linux Live on it. We can safely set the size of the partition to be 4 GB (=4096 MB), then choose either fat32 or ext4 as the File system and give Kali_Live as the name of the Label, then click Add to finish.
b. Create Persistence Partition
Next, we will create another partition as a persistence partition, which will store settings and files between reboots.
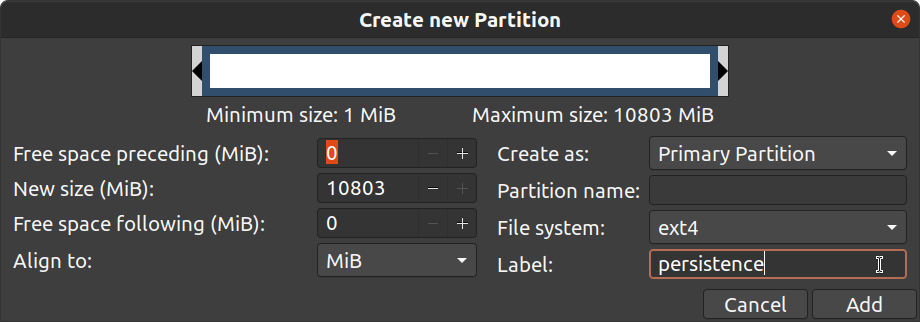
Rick-click the unallocated space and choose New to create a Primary Partition with ext4 as the File system. We will use all the available space for the size of the new partition and then name it “persistence” for the Label field. Note: you must name it exactly as persistence (all lower case letters). Finally, click Add to go back to the main screen of GParted.
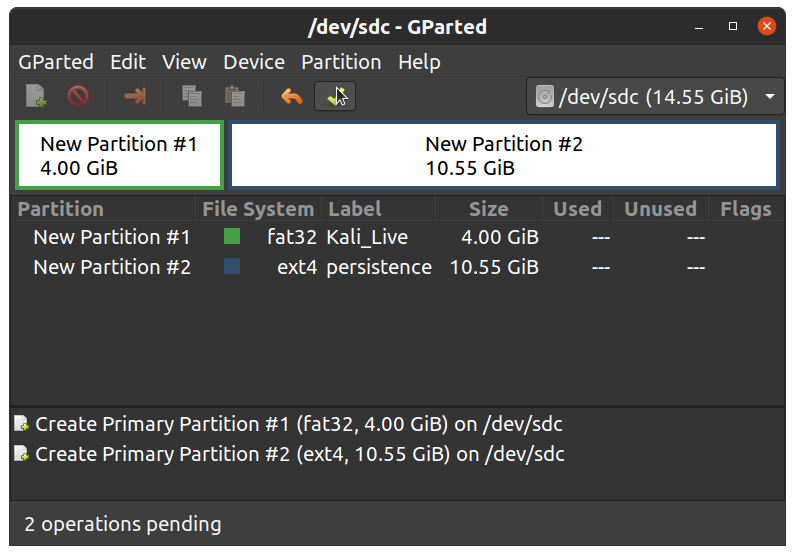
Click the green checkmark on the top of GParted screen to apply all the partition changes we just made, and it will take a while to complete, depending on the size and speed of your USB drive.
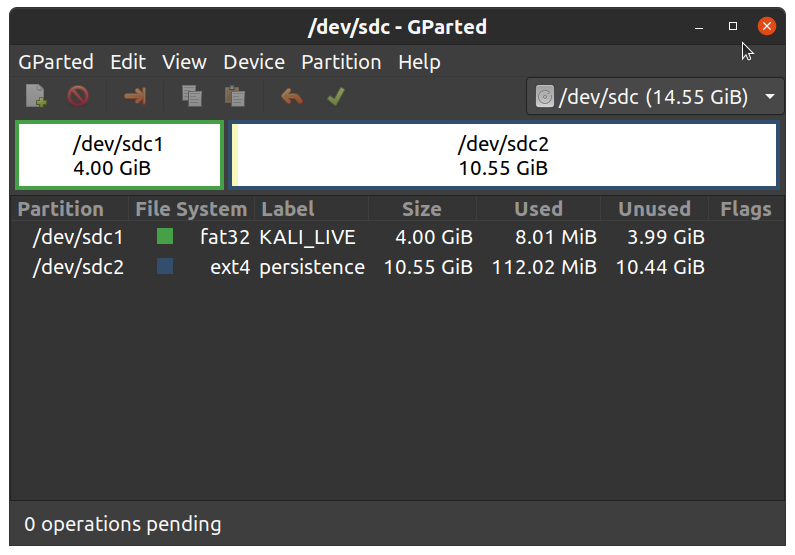
Once done, exit GParted and continue the steps below.
2. Write Kali Linux Live ISO to USB drive
We are going to use a tool called UNetbootin to write Kali Linux Live ISO file to the USB drive. UNetbootin is a cross-platform free tool that allows you to create bootable USB drives for Ubuntu and other Linux distributions (you may use another cross-platform and open-source tool called Etcher as well).
Launch UNetbootin, choose Diskimage, then browse for the downloaded Kali Linux Live ISO file.
Make sure the Type is USB Drive, and the Drive is corrected selected (in my case, it is dev/sdc1) to match the partition on your USB drive.
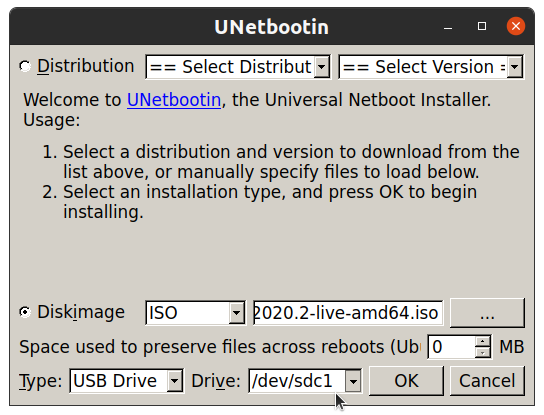
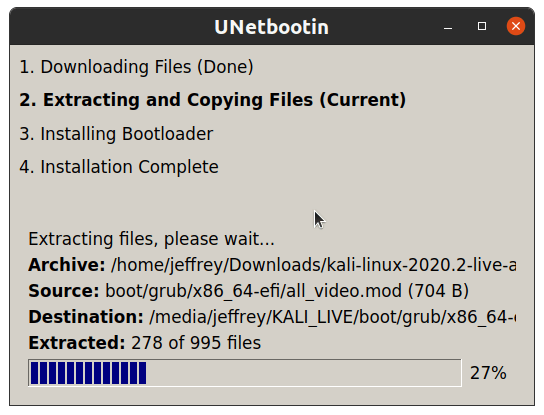
Click OK to start to write the diskimage file to the USB drive. It may take a while, depending on the speed of your USB drive (that is why I recommend using a USB 3 flash drive if your computer supports it).
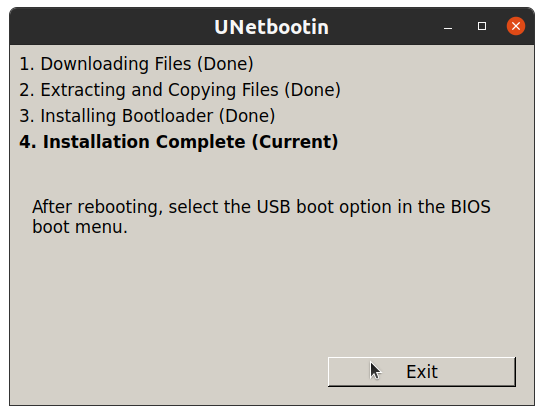
Once the process is complete, click Exit to quit UNetbootin, and now you are ready to use the bootable USB drive and to set up the persistence partition.
3. Boot Into Kali Linux Live USB
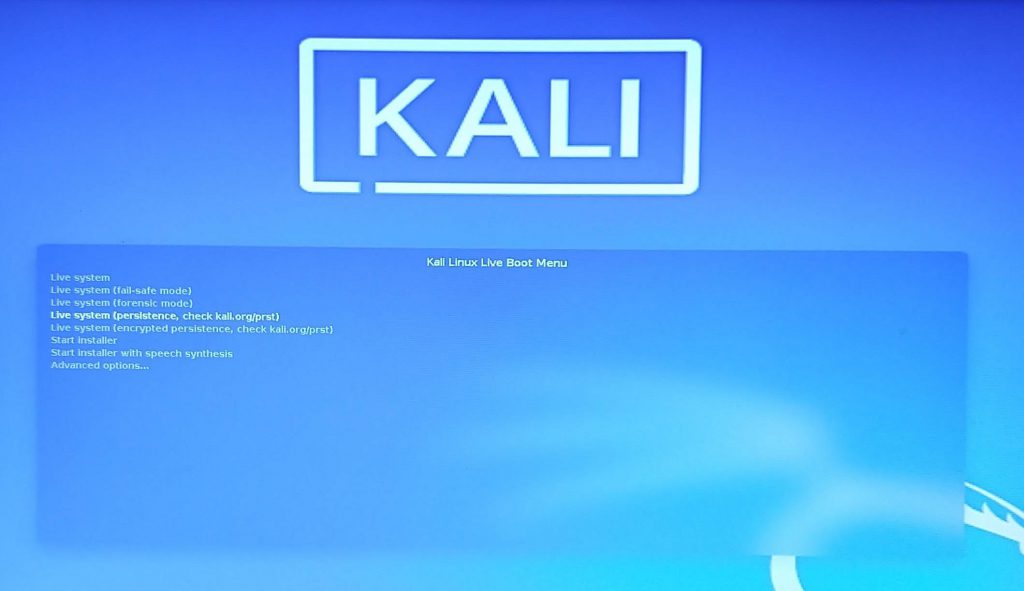
You might need to check your manual or search the Internet to find out how to boot your computer from a USB drive. Once your computer is booted from Kali Linux Live USB, you will see Kali Linux boot menu, then use your arrow key to choose the fourth option from the menu: Live system (persistence, check kali.org/prst)
After Kali Linux Live has booted, run the following command in a terminal window:
sudo fdisk -lThe command fdisk will display the partition information of the computer. Make sure the two partitions we created are listed and remember the device name for the persistence partition. For example, my computer shows “dev/sdc2” is the persistence partition, and I will use “dev/sdc2′ for the rest of the post. Remember to change it to the correct device name for your computer in the following commands.
a. Create a mount point called kali_usb
sudo mkdir -p /mnt/kali_usbb. Mount your USB persistence partition to kali_usb
sudo mount /dev/sdc2 /mnt/kali_usbMake sure you mount the correct persistence partition of your USB.
c. Use nano text editor to create a new file called persistence.conf
sudo nano /mnt/kali_usb/persistence.confThe command above will open an empty file; in this file, type / union on the first line, then save the file and exit (press CTRL + x, then press Y, then hit the Enter key).
d. Unmount your UBS persistence partition
sudo umount dev/sdc2Now, you have successfully created a Kali Linux Live USB drive with persistence and you can use it now.
To use the Live USB drive, just reboot your computer from the Live USB drive and select the fourth option from the boot menu. Once the computer has booted, all changes you make will be saved, such as new applications installed, new files, folders, Wifi passwords, and other network settings. You can even update Kali Linux to the latest version if you choose to, but a word of warning is the I/O speed of a USB drive is much slower than a normal hard drive, so the OS update might take a long time to complete.
I hope this post helps. If you have any questions or comments, please leave them below.
Reference: If you are a Windows user and would like to know how to create a Kali Linux USB drive in Windows, you can check this helpful post: https://devanswers.co/guide-kali-linux-2018-live-usb-persistence-windows/

Hi, thanks for the tutorial. What about thinking to re-use the persistence of a previous version of kali live? I try to better explain myself, i used for a while the usb kali live version 2023 with persistence. Now i created a new usb kali live pen with kali 2024 upon it, but i would like to keep on working with the old persistence. I tried in many ways but didn’t succeed. The best scenario (copying and pasting the partition through gparted) is that the system is so slow to load and then in 95% of the cases is not… Read more »