Windows 10 is a great operating system and works great…oh well at least when it’s working it works great. When it’s not working, you will probably be banging your head on the wall and yelling why. Recently I just had a moment like that. I was using VMWare Workstation Player 12 and decided to upgrade to Player 14, so I need to uninstall Player 12 first. It should be a simple task in Windows 10, right? It turned out it is not that simple. I clicked Start->Settings->Apps, and found VMWare Workstation Player 12 in the list, but both the “Modify” and “Uninstall” buttons are greyed out.

So a simple task in Windows 10 turned out to be a big research on how to uninstall VMWare Workstation Player 12 in Windows 10. Do you feel me?
After quite a bit research, here are some ways to uninstall VMWare Player 12, or any program, in Windows 10.
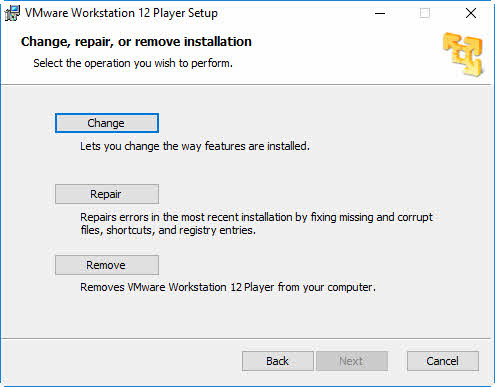
1. If you still have the original setup executable file for VMWare Player 12, just run the installer again and it will give you three options: Change, Repair, or Remove. You can click “Remove” to uninstall VMWare Player 12 from your computer.
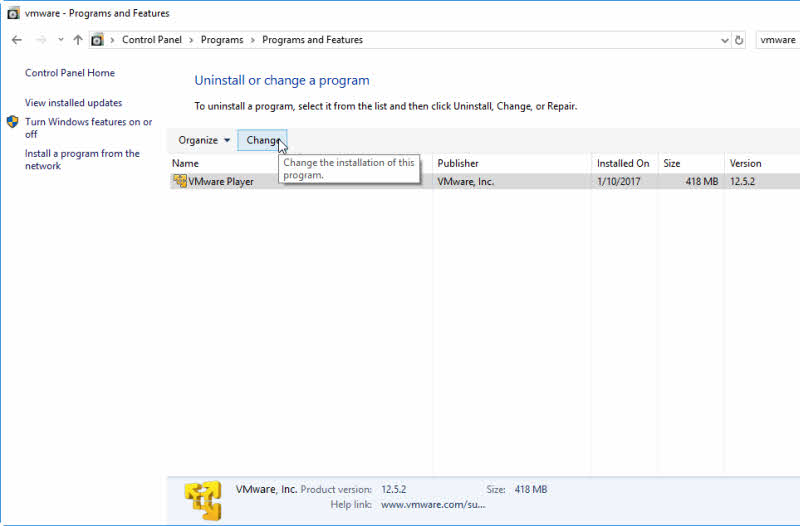
2. If you don’t have the original setup executable file, then click the “Programs and Features” on the top right corner at shown in the screenshot above. You will be redirect to the old “uninstall or change program” window in the Control Panel. Search the list for VMWare and click “Change” button after selecting the program.
Then, VMWare Player installer will start and you will see the same screen above to change, repair, or remove the program.
(In Windows 10, click Start, then type “Control Panel” and click it from the list, then click “Uninstall a program” will take you to the same screen as above.)
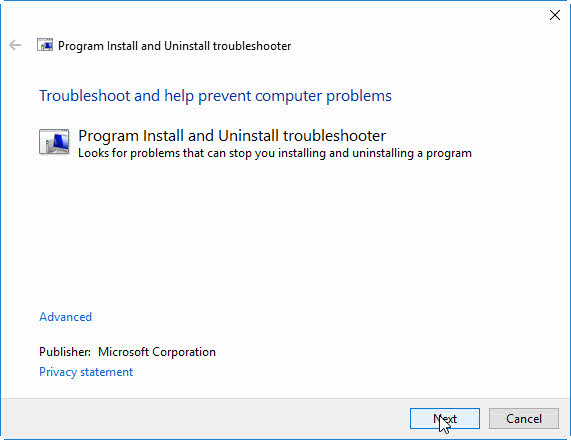
If all the above failed, then you can use a tool from Microsoft to uninstall your program.
1. Download Microsoft Program Install and Uninstall Troubleshooter
WARNING: This tool may reboot your computer automatically after troubleshooting, so make sure you save your work, close all other programs before launching the tool. You have been warned.
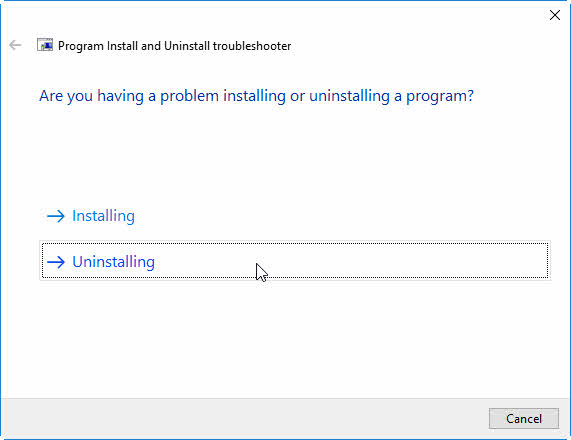
2. Double-click the downloaded file (the file extension is .diagcab) to launch it
3. Click Next, then choos Uninstalling
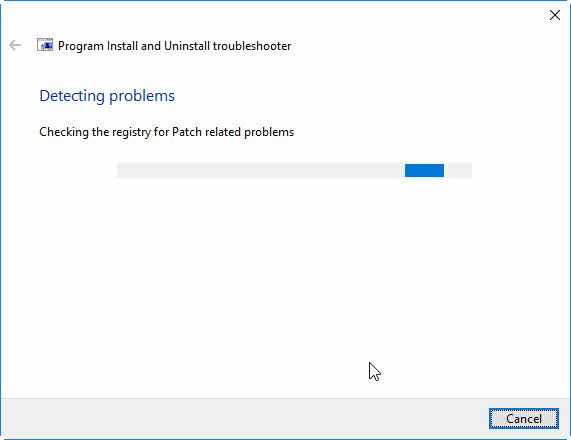
4. Wait while the tool is checking the issue
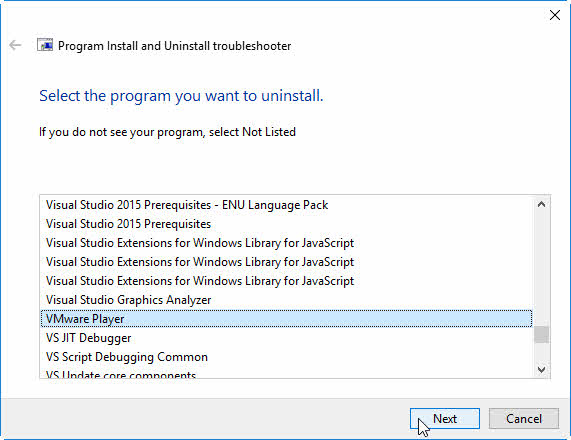
5. Choose the program you are trying to uninstall (or install). In my case, it is VMWare Player. Click Next to continue
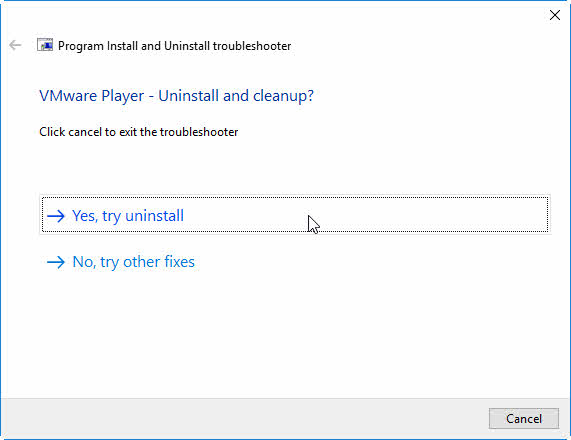
6. Confirm that you would like the tool to uninstall the program
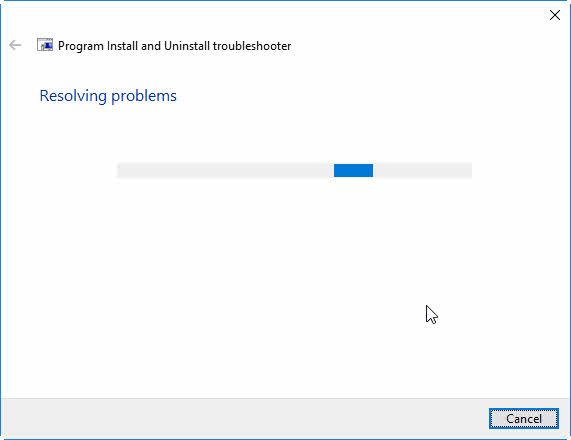
7. Hang tight while the tool is trying to uninstall the program
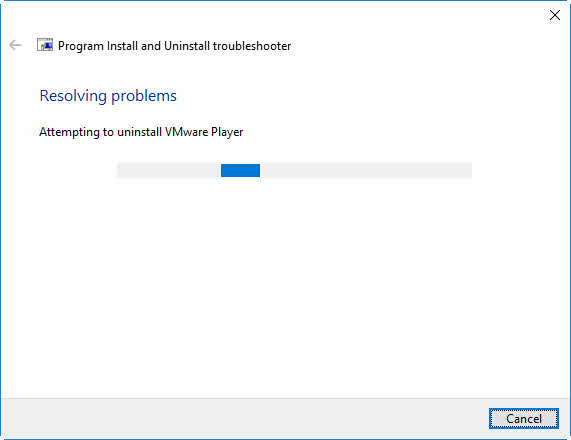
In my case, the tool automatically reboot my computer. And after the reboot, VMWare Player 12 was uninstalled.
Please let me know if this helped you.


VMWare Workstation Player only lets you run one virtual machine at a time and you will have to upgrade to the paid version VMware Workstation Pro Player in order to run multiple virtual machines at the same time, or switch to the open source VirtulBox
Thanks a lot… It’s useful
I had to use the last option (using the Microsoft “Program Install and Uninstall Troubleshooter” app) to get this thing to uninstall & it worked perfectly.